These days i'm receiving a lot of emails from people asking me how the muscles work.
This forced me to "cook-up" something fast.
The next short tutorial leads through some of the most basic techiques behind the muscle rigs.
Instead of showing you how to create another boring biceps muscle, i will model and rig part of the shoulder muscular structure - the pectoralis muscle, because this area is really tricky and most of the rigging techniques fail here.
In fact the real pectoralis consists of multiple muscular fibres, but i will represent them with two muscle primitives balancing between approximation of the model and matching the behaviour of the real muscle as mutch as possible. |
| |
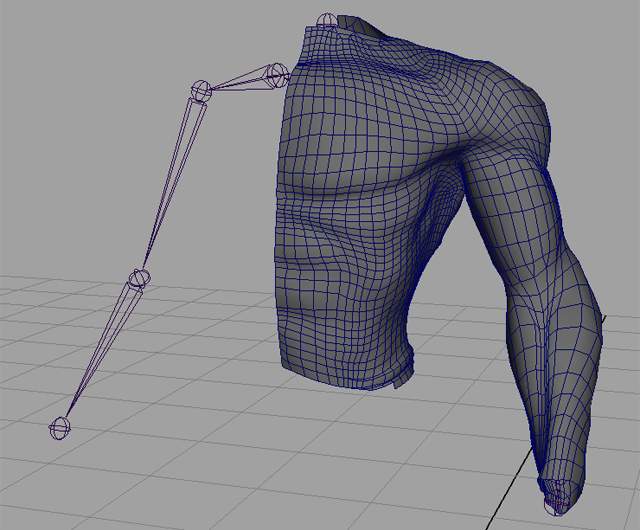
First of all we need a basic skeleton and torso geometry with good enough topology. |
|
| |
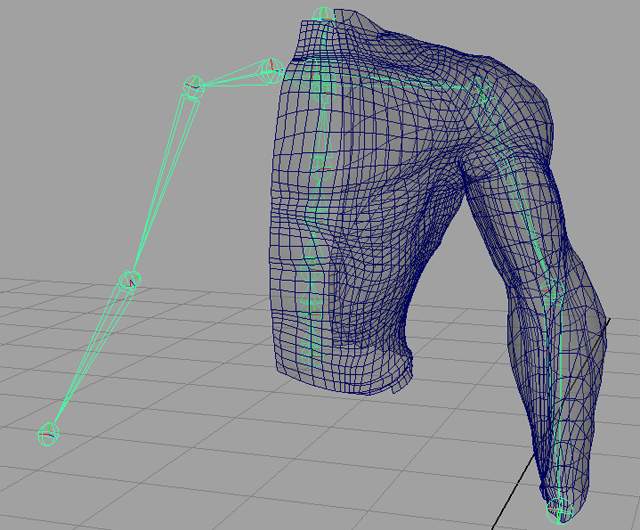
| The skeleton, as i said above should be pretty basic, but even that we must spend good time to place the joints in the right spots. Some anatomical knowledge and good rigging experience are very helpfull here. |
 |
| |
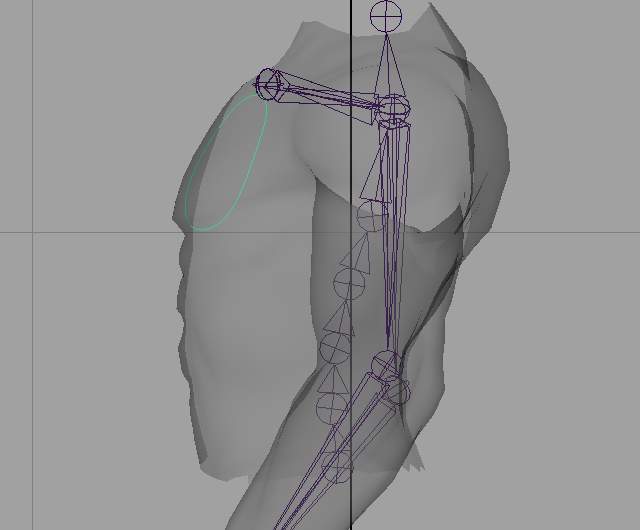
We are ready to start modeling the curves which will be used later as muscle cross-sections, forming the muscle envelope.
Use Maya's "EP Curve Tool" and draw a curve in the side viewport. Then apply "Open/Close Curve" command over it, delete the history ( this is not
neccessary, but i like it - keeps the scene clean ). Try to match as mutch as possible the torso topology and keep in mind that my muscle primitive must be with close enough shape to the real one. |
 |
| |
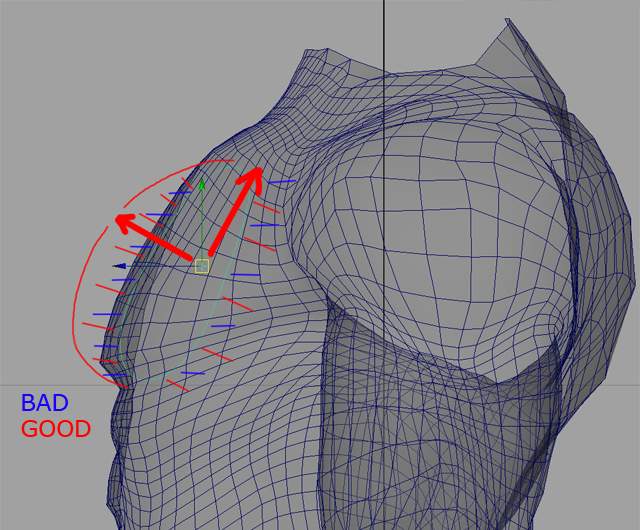
After we are quite lucky with the result, it is time to change the pivot orientaion of the curve. The direction of the muscle's bulging is dependent by the local axis orientation of each cross-section. The blue lines on the screenshot below show the bad ( default ) pivot orienation - later the muscle will displace the geometry in this direction, we dont like this. Why that, using the "Edit Pivot Rotation" command located inside the "Aditional Tools" drop-down menu of the Muscles UI, we will change the pivot orientation. Finish this task using the "Complete Pivot Rotation" command located in the same menu mentioned above. |
 |
| |
Duplicate few times the curve and offset the copies in the space. Place them where you
think they should be ( this is pretty mutch point of experience - with every next
muscle rig you will understand better and better the the muscles mechanic ). Most of the muscles can be constructed from 5 to 7 crossSections, the first and last ones are very small,
the rest form the muscle shape.
For the inner part of the pectoralis we will need 5 cross-sections. |
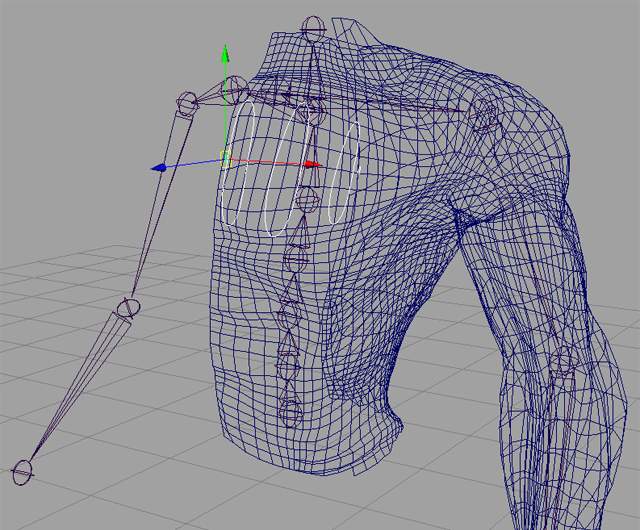 |
| |
Create a new GUIDES_TREE group: Muscles UI -> Guides panel -> "Create Guides Tree" button. This will create a group containing bunch of subgroups. All this is more important for the full release of the Muscles, but is helpfull and for organization purposes in the public version.
Select the curves and convert them to Guides: Muscles UI -> Guides panel -> "Activate" button. The curves will be colored in light yelow color and displayHandle will appear for every one of them. We need all this, because the muscle rigs get messy very fast and we need some help for easy recognising and selecting of different components.
Parent the newly created guides under the guide subgroup called Lf_Pectoralis, located inside the GUIDES_TREE.
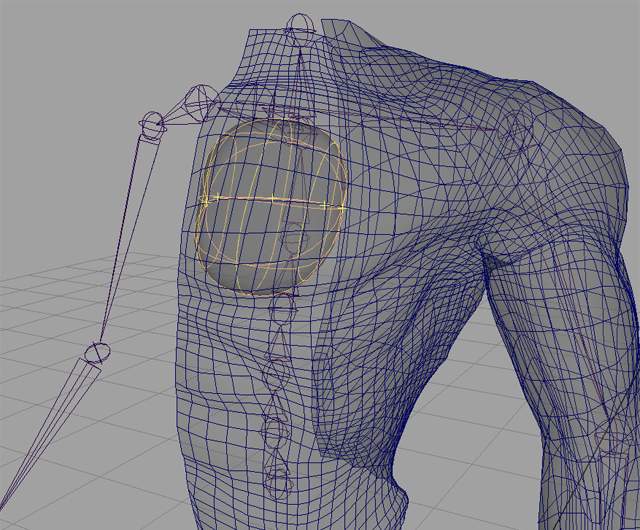
Apply a preview: Muscles UI -> Preview panel -> "Avtivate" button. A new surface will be lofted around the guides inside every guide group - this is some kind of fast feedback of the basic muscle shape. It is helpfull for fine remodeling of the guide curves.
Something like the screen below should appear. |
 |
| |
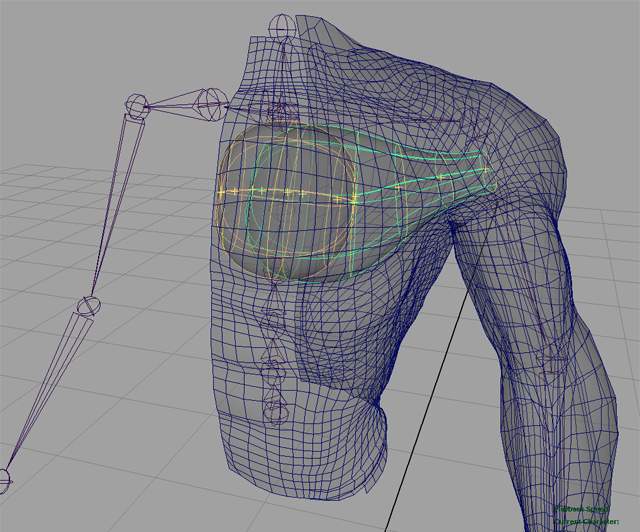
Duplicate couple of times the middle guide curve ( the bigest one ). Offset a bit in the space the new copies ( to have visual feedback in the viewports ).
Create a new guide group inside the GUIDES_TREE - use Groups -> "Create Muscles Group" button and name the group Lf_Pectoralis_Out. Then parent all the new guides inside this group. Press again the Activate preview button and remodel the new guides until you get something similar to the screenshot below. |
 |
| |
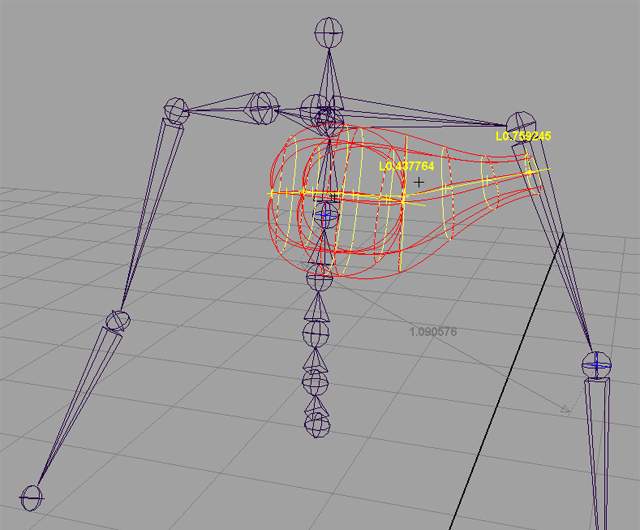
| After we are happy with the muscle shapes it is time to create the actual muscles from the guide curves. Select the guides in one of the pectoralis groups ( the selection order does matter ) and press the "Real Muscle [ From Selected Curves As Cross-Sections ]" button located in the "Create Muscles" panel. Do the same for the guides in the other group. |
 |
| |
Point constrain the inner DistanceControler's locators to one of the spine joints, constrain the outer ones to the elbow joint. Grab the arm joint and rotate it around - the muscles should change their shape.
You will notice that
the previous act changed the muscle shapes. Use the "SetBaseDistance X Y Z" and "SetBaseLength X Y Z" tools to set the current
distanceController's length as the basic one and in this way to put the muscles back in their original shape.
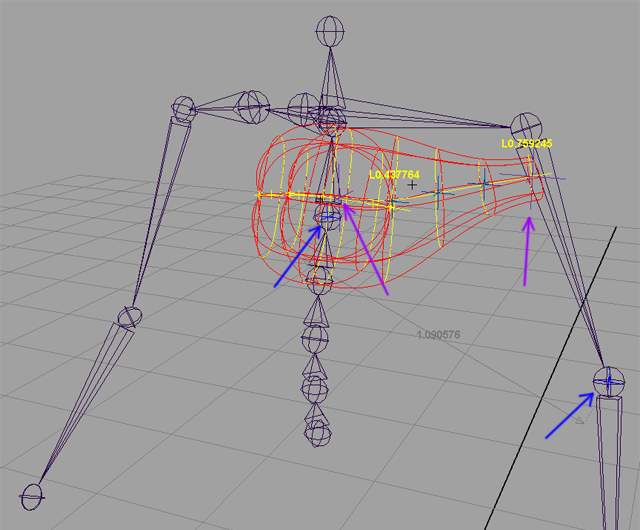
Now it is time to create the IK system for the outer pectoralis muscle: select two cross-sections ( marked with purple arrows on the screenshot below ) and use the "Activate IK System" button in the muscles UI. This command will create a big purple crosses ( Hooks ) for the selected cross-sections and small blue Hooks for every cross-section between the selected two. Point/orient or parent constrain the left purple Hook to the arm joint, constrain the right purple Hook between the shoulder joint and one or two spane joints - will be needed some experimenting to get the proper constraint weights.
IMPORTANT: never reparent the Hooks ouside their HOOKS group. To make their cosntraining stable you must Zero-Out the Hook attributes before that. In case you are not familiar with this technique, i will explain it shortly: DONT use the "Freeze transform" command. You need to group every one of the Hooks which will be constrained and to transfer the current translate, rotate, scale values from the Hook to the new group above it. Then make equal to 0 all the Hook transform attributes. After that you are ready for a proper constraining which will never brake ( or at least will be very-very stable ). Go to www.comet-cartoons.com and download the MEL pack, it includes a script which will automate this task. Also there are included and point-orient constraint scripts which use the good old parent constraint technique with point/orient constraints + offset group.
Ok, for the IK system was easy, but what about the rest of the cross-sections ? The answer is that you must apply Hooks to every one of them and to constrain these Hooks to one or more joints. Ok, but why we need these extra objects ( Hooks ) instead of directly constrain the Cross-Sections to the skeleton ? The answer is that the muscle structure is not allowing that, it is a long story, but i will stop here, just use intermediate objects ( Hooks ) to do it.
Ok, enough theory, go back to our tutorial:
Select all the Cross-Sections which are still not hooked-up and use the "Activate Hook" button located inside the "Hooks" panel. Then use constraints to attach every Hook to the desired joints. In our case you will need to constrain them to the shoulder joint and one or two of the spine joints. |
 |
| |
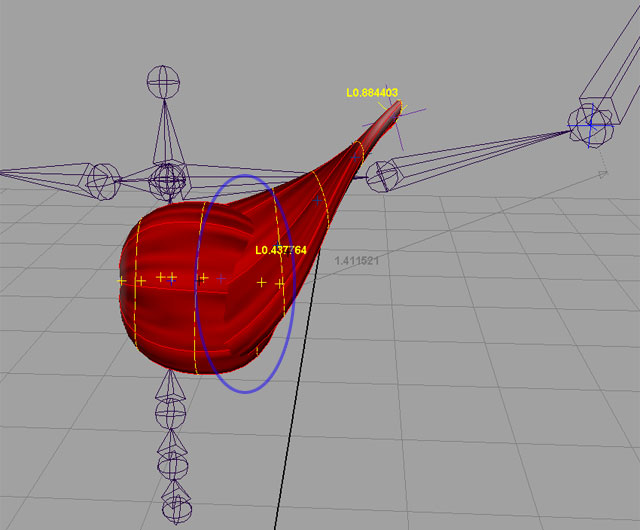
| After all the Hooks are constrained, put the skeleton in different poses and see which constraints are not working well - will be needed some time to improve the constraint weights, or to reconstrain some of the Hooks to different joints. The screenshot below shows the first test - you can see - the IK System produces bad deformation of the outer muscle in the area marked with blue ellipse below. |
 |
| |
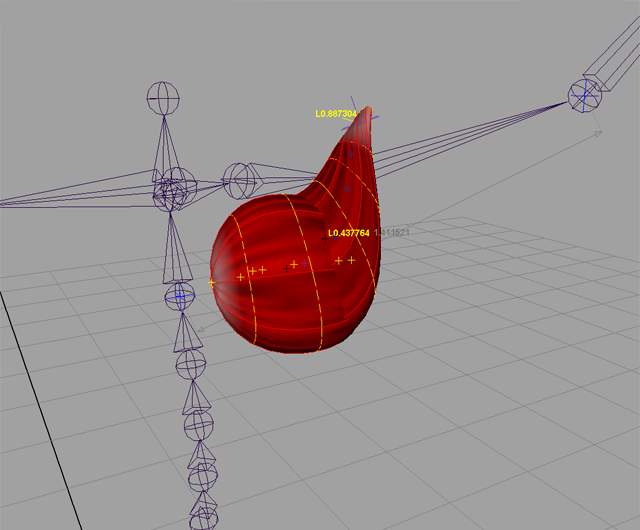
| You will need to edit the constraint weights for every Hook controled by the IK System ( the small blue ones, not the big purple crosses ). Select one and of the Hooks and use the "Update Weights" button located inside the "IK System" panel. This will update the sliders below that button with the current values of the constraint weights. Play a bit with the sliders until the Hook's position/orientation deforms the muscle as we expect. Do the same with the rest of the Hooks controled by the IK System. After a while you should see something like the screenshot below. |
 |
| |
From that point you are ready to use the muscle envelopes as geometry skin influences ( dont forget to turn-on the "Use Component" flag of the skinCluster node ).
If you need, use the envelopes as sculptDeformers. Dont forget to use the "Edit Membership Tool" for every sculptDeformer - this will improve a lot the performance of the rig.
You will need to go through couple of iterations of setting-up the muscle bulging, changing constraint weights, remodeling of some cross-sections, skinWeightsPainting, adjusting of sculptDeformers, etc.
A lot of patience is needed here. |
| |
| One good idea: after the guide curves are converted to muscles, a good idea is to parent the MUSCLE group under the root joint of the skeleton, this will make the rig more stable. Actually, a better way is to have 5 MUSCLE groups, for example: MUSCLES_UP_LF ( for the left shoulder/arm muscles ), MUSCLES UP_RT, MUSCLES_LO_LF ( for the left pelvis/leg muscles ), MUSCLE_LO_RT and another group MUSCLE_BODY ( for the body muscles ). Parent them under the closest joint in the hieratchy, for example: MUSCLES_UP_LF must be parented under the spane joint under which is parented the LtShoulder. Another way is directly to parent every muscle under the closes joint - but the scene navigation will be really difficult in this case, but this can be done at the final stage of the rig. |