|
|
|
| [ ShoulderRig 1.3 ] |
|
| There is a very old and stable working technique keeping the volume of the shoulders / armpits in extreme poses and making the deformations looking mutch better. The idea is to add extra joints around the shoulders and to automate their motion. Lets see how it works ... |
| [ TOP ] |
|
| [ UI ] |
| |
|
 |
|
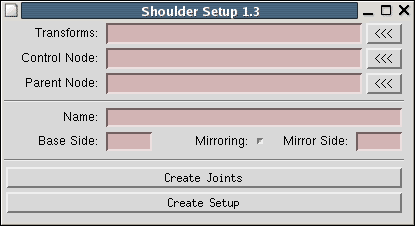
The UI consists of a simple dialog box with the next elements:
Transforms: you need to pick-up two transform nodes which will define the start / end joints ( take a look at the notes below about the workflow ).
Control Node : a transform node, controling the behaviour of the shoulder's extra joints.
Parent Node: that's the node to where are constrained the extra shoulder joints.
Name: that will be the basic name of the newly created nodes. RMB opens a menu with predefined names. |
|
Base Side / Mirroring / Mirror Side: a little automation to make our life easier. RMB shows a menu with predefined Lf, Rt, Cn sides. If the Base / Mirror sides are Lf and Rt and the "Mirroring" checkBox is turned on then the script will try to automaticly mirror the setup to the opposite side. |
| |
|
|
| [ TOP ] |
|
| [ WORKFLOW ] |
| |
|
| The wofklow is pretty strightforward: |
| |
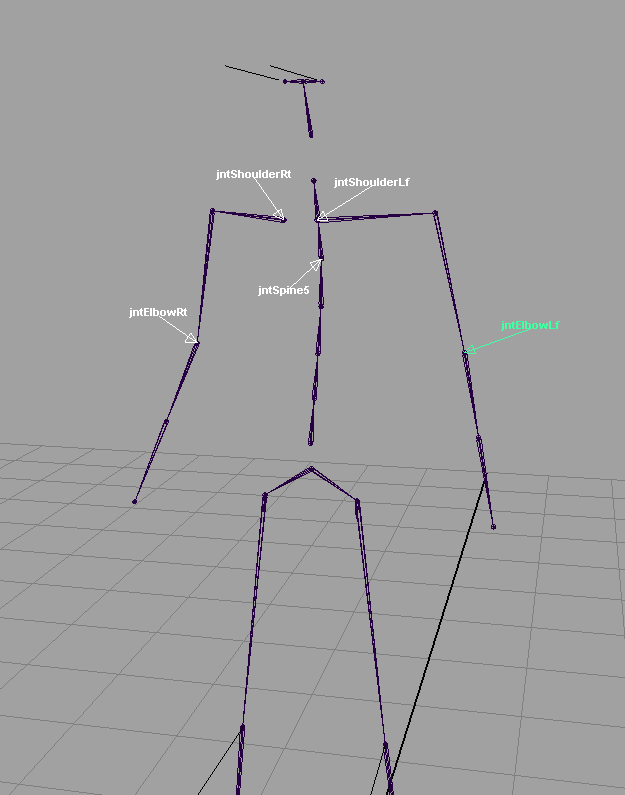
| Few joints are important to make the shoulderRig work fine: elbow and shoulder ( or spine ). Usualy the elbow joint is used as controlNode and depending by the model, skeleton proportions, or other specific requerements and needs, the shoulder or one of the spine joints is used as Parent Node. I personally prefere to use the spine joints for that. |
 |
| |
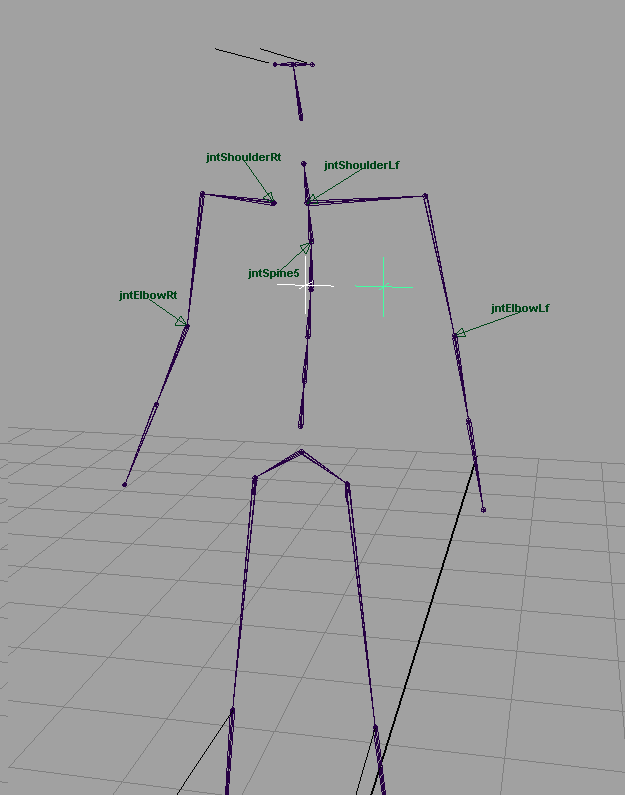
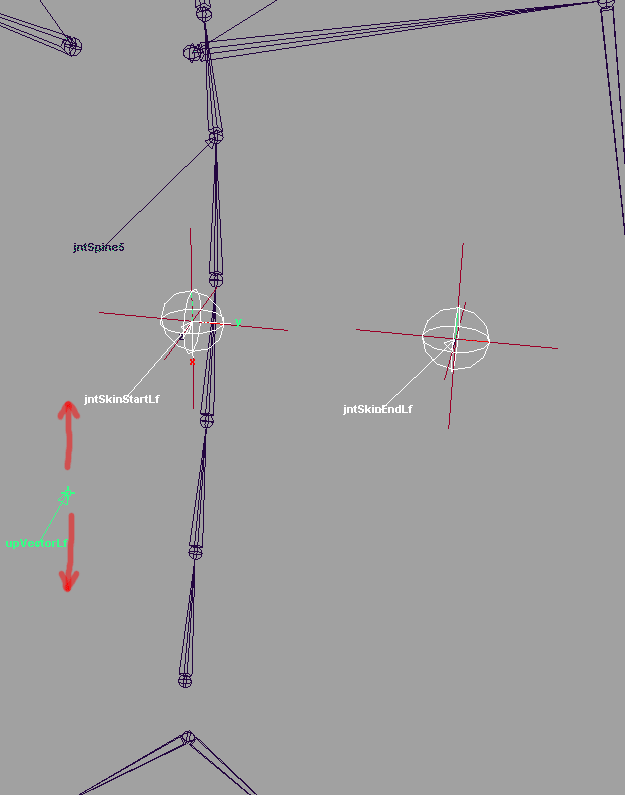
| The next step is to create two transform nodes. I'm using here locators. They will define the positions and orientation in the space of the start / end shoulder joints. In most cases you will need to play a bit with the placement, going for and back through the rigging process of the shoulder thing, to get the best result. |
 |
| |
After you are happy with your placement, select the locators ( the order does matter ) - first select the inner one, then the outer one and press the "<<<" button located on the right side of the "Transform" textField. Then select the elbow joint and press the "<<" button right to the "Control Node" textField. Select one of the spine joints ( usually the one who is affecting the chest / upper chest area ) and press the "<<<" button right to the "Parent Node" textField. Type, or select from the pop-up menu the name of the new shoulderRig, select the side and press the "Create Joints" button. This will snap to the locators two newly created joints. Their orientation is linked to the position of the uvVector group. You can move it up and down to interactivelly adjust the upVector of the joints. In most cases the default condition should be enough.
After you are happy with all that you are ready to actually create the shoulderRig. |
 |
| |
| Press the "Create" to finish the rig. You should see something like the picture below. |
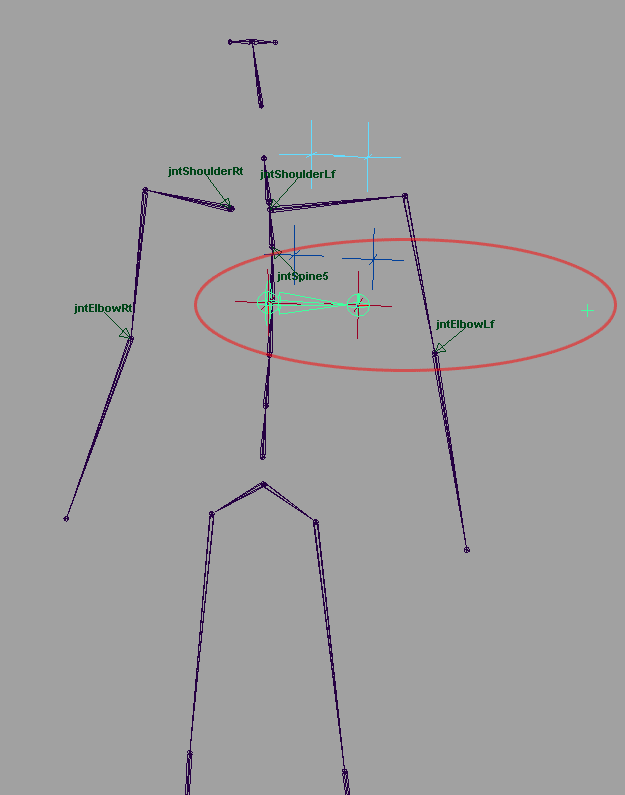 |
| |
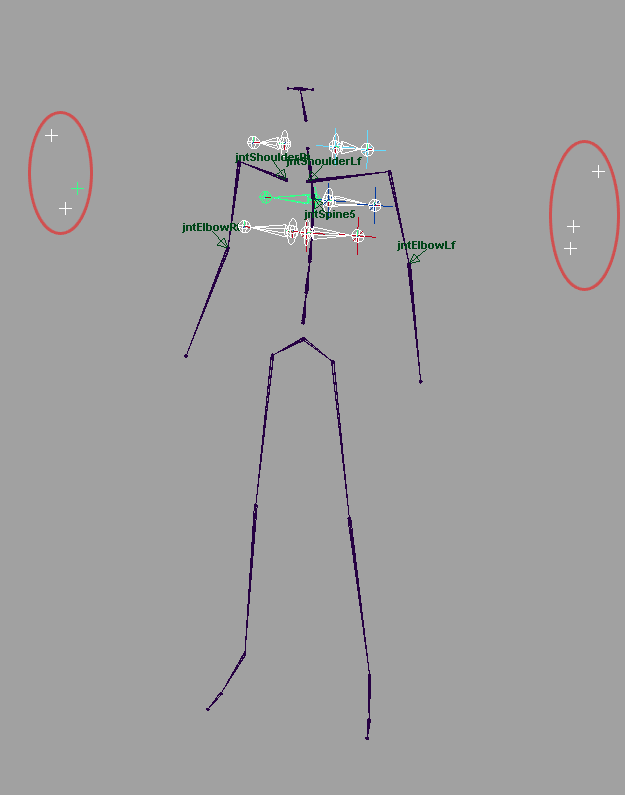
| Repeat the rigging process to create extra joints above, behind and if it's needed below the shoulder area. In the screen-shot below i'm using only 3 extra shoulder joints. In most cases that is enough.
Notice the small handles on the left and right sides. They are the aim targets for the shoulder joints. They are affected by the elbow joints in a way allowing the shoulder ones to only look at them without twisting. And that's exactly what we need.
Maybe all this sounds too unclear for you at this point, but there is a example scene included in the archive file at the bottom of the page. Play with it for a while, i'm sure you will get the idea.
Using this technique i'm avoiding around 75% of the correctiveShapes ( PoseBasedDeformers ) with a simple weighting to few more shoulder joints. |
 |
| |
| The last part of the setup is to set-up rotation limits of the base joints. In this way you can allow the pectoralis joint to rotate forward, but not backward, infraspinatus to rotate backward but not forward, etc. etc.
This step is all up to your needs to make the shoulders more flexible or stiffy, according to position and motion of the arms. |
 |
| |
Few extra notes:
Once you finish the setup, you dont need anymore the original transform and upVector nodes used to place the shoulder joints ( those locators on the second picture above ). The script will not delete them automaticly, just in case you plan something for them later.
You can preanimate the groups above the aim targets using drivenKeys or expressions, to get additional control over the shoulderJoints.
We are going to use only the start joints for skinning purposes. The end joints are used for visual feedback only.
The shoulderRig technique can be used not for shoulders only, but in general everywhere - for hips, pelvis, etc. |
| |
| |
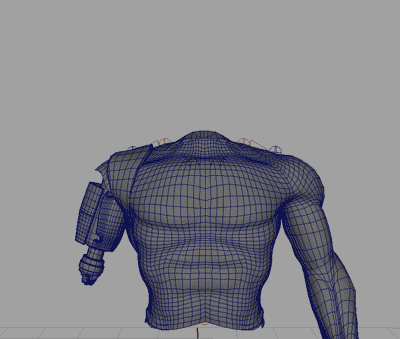
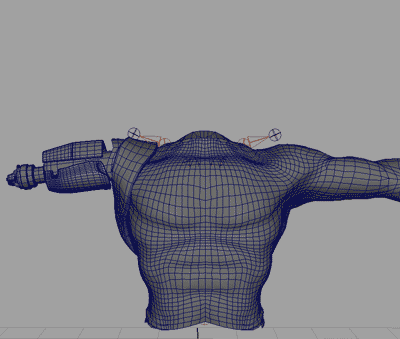
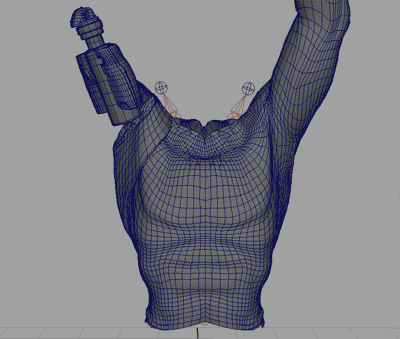
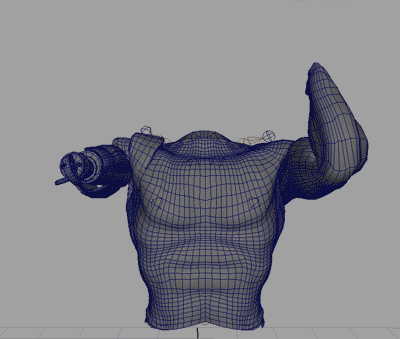
Lets take a look at the example deformations shown below, made by only using the shoulderRig:
|
 |
|
|
| |
| [ TOP ] |
|
| [ DOWNLOAD ]
12/11/2005 - updated ZIP archive with version of the tool for Houdini ( OTL + example HIP scene ).
The help is included as part of the OTL.
01/23/06 - fixed mirroring - dont know how, but in the in previous version it was broken |
|
|
|